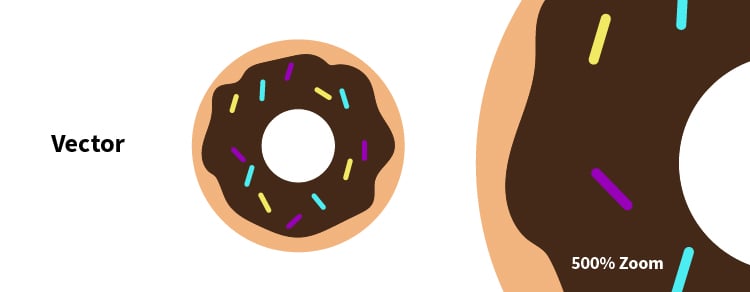
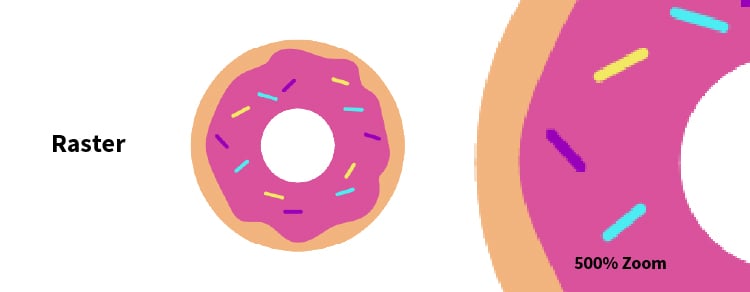
Understanding the difference between raster and vector graphic file types can make the difference between your brand assets looking clean and crisp or jagged and fuzzy. Consider this a cheat sheet.
“Doughnut” worry, though: these terms are not just for marketers, designers, or developers. These terms are for everyone.
Vector files: Math in action

Vector files are usually my go-to for creating logos, graphics, or signage. These files contain different paths that are based on mathematics calculations to form lines and shapes. They can be scaled down to a business card (3.5 x 2 inches) or all the way up to a highway billboard (14 x 48 feet) without losing quality.
Awesome-sauce, right?
This makes it much easier when you are designing something for different sizes or media. When you start with a vector graphic file, more doors open when you need to export your files into specific file formats like .png or .pdf.
Vector file extensions are typically .ai, .eps, .svg, or in some cases .pdf. The first two are created with Adobe Illustrator. With .ai being the native file and .eps being a universal file, either can output to an .svg file—allowing the user to control the color while scaling up or down.
Raster files: Pixelated DNA

Think about all those selfies you’ve taken. (Don't be shy, we all do it.) Those photos and images are rasterized. Rasterized images are set to display at a specific resolution and are made up of tiny pixels. Each pixel contains a little bit of information that helps to form the bigger picture. In this case, your lovely selfie.
One important thing you should know about rasterized images is that you cannot add scale more than 100% without losing quality. Remember those tiny bits of information that made up your image? These are commonly known as pixels per inch (ppi) or dots per inch (dpi). Think about them as your images’ DNA. You cannot add more information, but you certainly can remove some.
Basic best practices for your raster files are using 72 dpi for web-based photos and images, and 300 dpi for printed assets or photography. If you don’t know what the current resolution of your photo or image is, check the image properties.
Raster file extensions are typically .png, .jpg, .psd, and .gif. With .psd being the native file, all of these can be created with Adobe Photoshop. The important thing to remember is that they are made of pixels and do not always scale properly, so you need to optimize them for their intended location. This will help keep them looking good and not blurry. We try not to scale beyond 100% of the original image.
Takeaways
Use vector graphics when you need flexibility. Your logo will look crisp on everything from business cards to billboards. Note how the vectorized chocolate-frosted doughnut retains its clarity even at 500% zoom, while the rasterized strawberry-frosted doughnut looks blurry at the same magnification.
Raster graphics are better for photographs because pixels contain a lot of information. But resizing can result in a lower-quality image. Understanding these two terms can be the difference between a crisp and blurry image. Your choice will depend on your purpose.